
Panther Platoon – project
Well I started the Panther construction phase in earnest this weekend just been.
Progress was as follows:
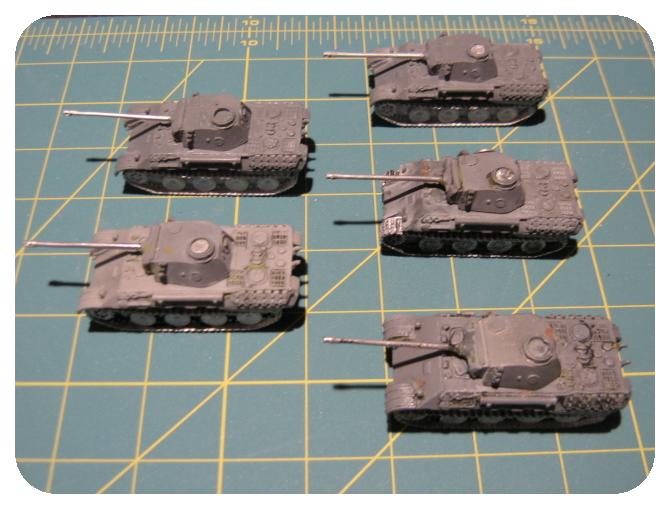
3 panthers stripped down in previous week. (Plus 2 Elephants, another story), pulled the tracks off where possible.
Re-levelled the tracks, Massive amount of filling to ensure the tracks sit both level and plumb to the tank body. These tank chassis sit so High that if it is out it does become noticeable.
Especially as one of the tanks has smashed front fender guards. These had to be cut with a modelling pull through saw and then filed gently to avoid taking off the two front lights. This tank is now my special Kompanie command tank.
I then brass brushed the tanks to remove any fine paint still stuck in the zimmerit finishes. Had to use the steel wire brush in some places. A steel brush is extremely harsh and cat practically sand down detail. As I am spray painting these I can afford to be a little heavy. A brass brush used in a circular or criss cross fashion can re-polish the resin surface. You wouldn’t know there was steel passed over it after this.
The exciting bit
Then I opened up my two new Panther blister packs, I was ready to clean then all (which I did later) and glue them all together (which I almost did) … why?
Well tank 2 was delivered with 2 left hand side tracks! Right! had this happen before when I bought a Tiger Tank… sent an email that Sunday afternoon and had a response that night. It is on its way from the Battlefront team as we speak.
So glued all together, AralditeV for the bulk of it but I did use Super Glue for the gun barrels. I prefer the Araldite™ because it is stronger for one (Buildings are built with Araldite™) and it isn’t liquid, which can run over and ruin your surface. (However I use it more later )
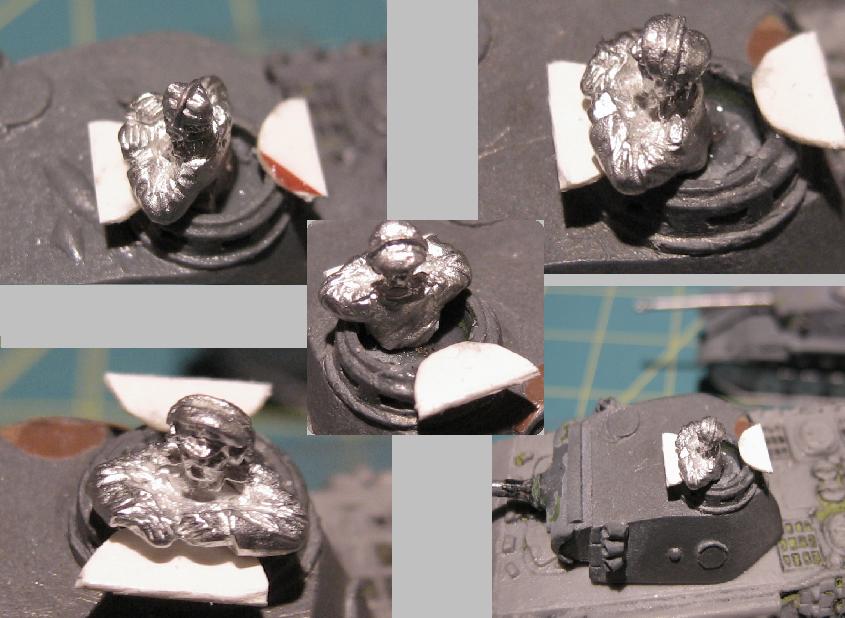
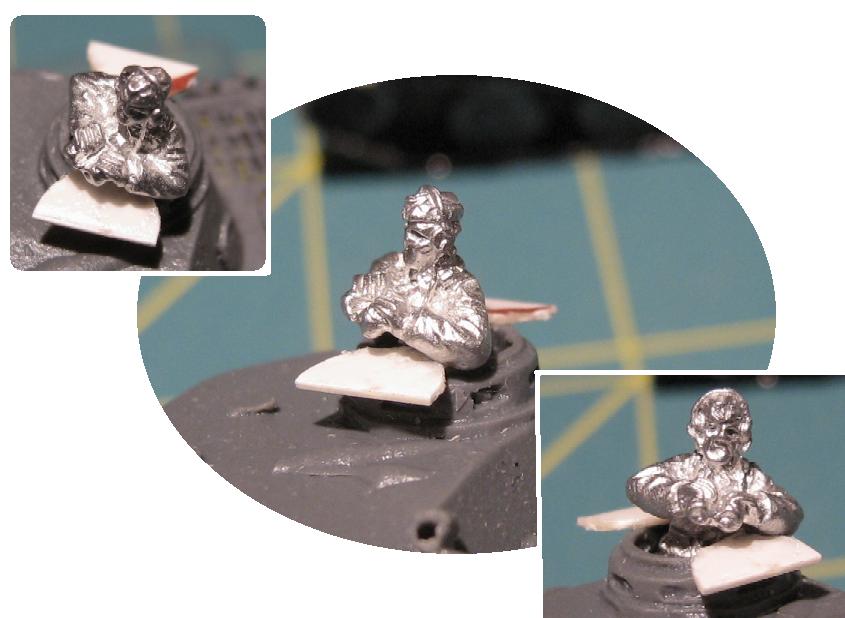
Next I chose two Panzer commander figures from my Peter Pig™ range, they are so much nicer than the BatteFront™ tank commanders. I picked a peaked capped one for the Kompanie Commander and a soft cap one for the Platoon Commander. I used some toe nail clippers to cut him at the waist and get a good pose.
As I was short of two commander hatch covers I decided to make the open hatch covers for the commanders. Here is my trick.
I templated the existing covers before gluing them closed on the three tanks (2 in the platoon and 1 in the 2ic tank, which might have no fenders too)
New note 20th May 2010:
New panther track arrived in post today. Wow… BF are great!
I have the track setting on the moel right now. May attempt to prime them tonight.
Reminds me I went to a guys place in Timaru a few years ago. A real student type flat… approched the back door porch and ther on a shelf along with dog lead, and back door gumboots etc is spray can of black minitures primer and white… I mentioned that all wargamers should have primer paint handy at at the back door for that quick job that needs priming.
Three weeks!!!! Just plow on and leave the other Panther to catch up later. I mean thats what happens when you’ve only got one working track. You miss out, and nobody throws the ball to y….. …ahem! …sorry got away on me a little there.
When I paint I paint a whole platoon at one time.. and take time on it.
I can always move on to the Elephants in the mean time.