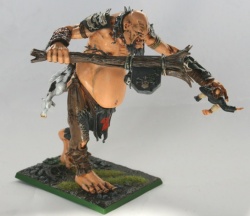
I bought this model cheaply second hand. It was partially and very poorly painted, plastic cement had been used to glue the figure and had melted and distorted some of it. Thankfully the paint was very thin so though it looked poor it didn’t adversely affect the figure. Anyway after much puttying and sanding and swapping out the things that I could swap out (it came with it’s sprues of additional bitz) I started painting it. Not used to painting a lot of flesh I was a little apprehensive but I think it turned out alright. Knowing what I know now I would have done it quite differently but alas that is not the case. Anyway painted up and pretty happy with it, the cow I still consider to be awesome (and by this stage I hadn’t ruined it with my rubbishy freehand orc design on the cloth between his legs) I went off to varnish it before somebody chipped the paint.
I sprayed the varnish on as I normally do only for the mist to start to condense into a stream part way through and before I could react it dumped a truckload of varnish going from his head to his belly, naturally on all the light flesh coloured parts. I stopped immediately and then watched to my horror as the acrylic paint started to split and sag from the weight of the enamel varnish. Laying the model on it’s back to vainly attempt to stem the affects of gravity on the sagging paint I stomped back into the house and tried not to think about it for a few hours. When I went back the model was virtually ruined, or at least that’s how I felt at the time.
I sanded back the ruined paint (quite a mission with all that varnish whilst still trying to preserve much of the other paintwork) and repainted and touched up. Turned out ok, not as smooth as it was but probably not too noticable. The most obvious areas are around the nipples and the belly button where it was difficult to sand. Fortunately you expect a bit of wrinkly fleshy tissue in these areas so it actually isn’t much of a problem. In this photo you can’t really tell.


