
My most recent work with the US Infantry platoons has developed quickly over a period of two weeks.
The new spring weather has perked me up no end and my motivation has returned.
I re assessed my procedure and tested the dry brush highlight on the inked models and came to a conclusion that the benefit was minimal to the extensive time outlay for the result desired.
This step was immediately removed even though the first test model showed brilliant results.
I moved on to the varnishing stage and sprayed a Krylon Matt Varnish finish (a can I had in storage for about six years.. still worked well) which layered well and dried remarkably quickly.
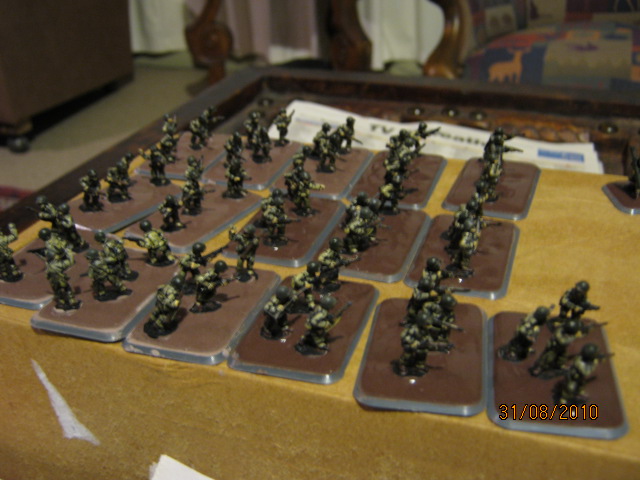
I then ordered the figures as to what poses were to which stands and set them out.
The bases were all collected together (including a whole stack of others i need for later projects) and when tot the garage where I set up a hobby rotary tool with a small round sanding cylinder. I then spent about 2 hours burring the top surface of the bases with a course sand paper so that the basing plaster will stick strongly to it later.
After this I had to sit down and do the one part I think I need to redesign in my process.
I had to pare away from the base of each soldier the PVA glue and card stuck to the bottom.
I am seriously considering some king of set of mails and block of wood with holes in it from now on with the use of blue tack to hold them on… but then the blue tack can go soft apparently and also the spray paint can stuff the tack.. any suggestions?
Anyways the base of each soldier still had PVA and torn card fluff so had to carved off with blade.. and later I used a file which was both quicker and safer.
The fun part… gluing the soldiers to the base with cheap Cyanoacrylate this took 2 nights… longer than I anticipated… I think I was cooking that night.
Super fun part.. ground basing.
Now we have options here.. some people use pumice paste.. I don.. I use what is easily available.. Plaster board filling compound, or Pollyfilla™
I use a special secret recipe… standard recipe is 2.5 parts filler to 1 part water.
I add 1 more part water and about the equal of 2- M&Ms sized parts of brown cheap poster paint.. colour.. dark Ochre Brown. The dark brown will fade out heaps when the plaster dries… but it will be a dusty brown colour.. it should look like a medium dampness friable soil colour. Also if your base ever gets chipped during play you won’t see a glaring bright white plaster.
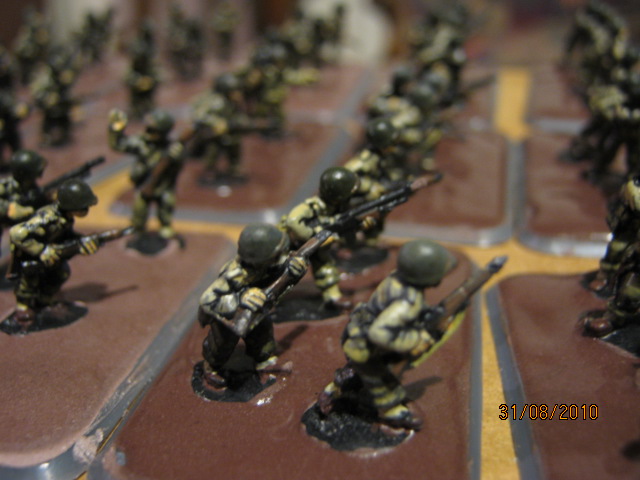
As you will see in this photo I mixed a little browner in the stands to the right than the ones to the left. As of this morning (the day after) the dark brown has kept its dark shade mostly. So if you use about 3-4 M&M size blobs of paint you can get a very dark soil.
I use a deep BF blister scarp to mix my plaster in. I use a ½ teaspoon measure and it is important you do measure reasonably accurately if you want consistent results. Although the paint is proving difficult to measure.
I use a sculpting tool with a fine spear tang tip and a rounded paddle end tip. I used the paddle to mix the paint and plaster and when the figures are based close together the thin spear tip is used to place the plaster.
The consistency of this plaster is reasonably watery. It flows with a little guidance but isn’t so free that it won’t sculpt up to a point. It is best described as being like a soft whipped cream.
I then wipe my finger tips or a tissue along the base edges leaving the grey plastic edge, which looks really neat.
Later I will glue flock and grass to these… the brown colour will look good under that.
PS I tried green plaster once… never again.
I painted a little more last night did the black and white chequers which takes me ages to do. Not much more to go now though. A little red and a few touch ups and funnily enough the basing.
I also use pollyfilla or gib stopping compound. Have been using the same stuff believe it or not for about 7 years. I mixed sand into it (we had a sand pit for the boys in the old house so had quite a bit of sand) and every now and then I’d add a little water to it to keep it workable. The consistency of mine is still a bit crumbly like soft cake really. Using a small almost jewellers size flat head screw driver I apply the crumbs to the base and then squash them down. It definitely does not flow in and around the models so it’s a very time consuming job particularly on 15mm bases with four or five models a base. On the upside though the mix is rock hard it is essentially concrete and pretty much requires tools and intent to crack or chip it. I paint it with the same dark umber acrylic paint and dry brush it graveyard earth before flocking. I’m almost out of this special mix though so I’m going to need to do something new. I have almost 15kg of gib stop in the garage which I guess will be a start.
I’m not sure I like how smooth yours mix is though one thing I like about my mix is that the medium is very rough (sand which can be softend by more water) and the application of bits at a time means you get a very undulating rutted effect in the earth. I do appreciate though it’s probably orders of magnitude easier to apply. I guess some sort of middle ground is what I’m looking for.
With regard to attaching the little guys to a strip of card or wood I’ve had similar issues.
I find with the pva if you put bigger dollops onto the card so that the pva sought of folds around and over the little base it’s easier to remove the model afterwards. Basically I think because there is enough flex in the pva that it cracks and peals better than if you’ve been really sparing. It’s still not ideal though because you have to stick your fingers all over the model with reasonable pressure to break it off which. Being so small it’s really easy to rub away the paint of multiple places at once (like boots and guns etc) meaning a lot of touch up. I’ve tried blue tack and yeah it can go soft if the environment is warm enough the result being things come away from their base at awkward moments and you still have a bit of a mission cleaning the blue tack off.
As for getting paint on the blue tack it’s not really a problem. I use blue tack for fixing models when priming and have for painting 15mm stuff as you’re suggesting. Despite getting a bit of paint on them it doesn’t really mess the blue tack up other than making it not quite so blue.
I think the idea is pva and would because wood is dense enough not to tear when you snap the model off. I’ve seen photos of people using dowl rods, but at 15mm thats probably a bit inefficient but a strip of wood might work. Nails might work also but the same deal as with dowl. If you’re painting 20 at a time seems kinda fiddly.
Ohwwww crumbly polyfiller… with sand.
You know I have tried that… lots of work pushing that stuff around bases.
Try making it a little wetter… much quicker.
This temporary basing needs to be sorted.. I have to find a better way.
Oh… one trick .. you should varnish the figs bfore removing from the card. That way you won’t rubb off all your art work.