This is my first real attempt at airbrushing my models. That is to say with the exception of an F4 Phantom that I airbrused when I was about fifteen and a couple of evenings mucking around with Martin’s airbrush, this is my first attempt. So not really my first attempt at all then.
Anyway having recieved the Paasche Talon Airbrush set (http://www.chicagoairbrushsupply.com/patastsetg1.html) for which a good review for the Talon itself can be found here http://www.armorama.com/modules.php?op=modload&name=Reviews&file=index&req=showcontent&id=3675 this was my first crack at using it apart from spraying a bit of paint and water on a piece of card. So naturally I chose two of my most expensive flames of war models to start with. To be fair these have been sitting around for a while because I wanted to airbrush the camo scheme on them rather than attempt to paint it on with a real brush, so they were in part why I got the airbrush. Still I probably should have practiced a little more.
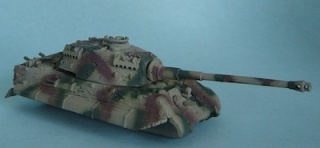
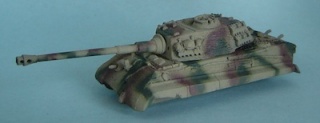
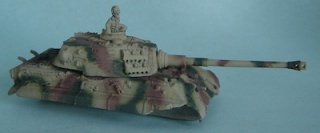
Base coating the dunkelgelb was fantastic. So much so I’ve since basecoated some warhammer stuff. So much faster than using a brush and a better finish. I notice base coating stuff gives me the opportunity to practice with the brush a little controlling the flow of paint etc. After the yellow I painted on the green and brown. I’ m pretty happy with it. There are a couple of areas where I’ve got a bit of water spray (which wasn’t moisture I just had quite thin paint and allowed it to dump a bit much of it on the model in one spot, it’s this bit I need to get better at most of all).
Not totally sure where to go from here, whether I try to fix up the couple of splatters with more yellow with the airbrush or some careful paint brush work, inks and drybrushing. At any rate I’m reasonably happy with how they turned out and with the airbrush too.
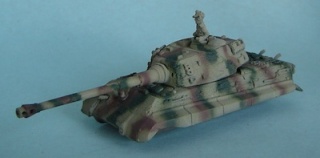
Terrific…. really nice job. your AB has avery nice fine line… mine still tends to be a bit broard or worse I don’t know when to back off and leave a sligh or subtle colour as opposed to filling in the area.
Where to from here… if you think your shit hot at this .. I suggest a shwimmenwagen model.. there half the size of a postage stamp.
Or just give us updates on where you go to from here…
I realised I had not fitted the mud gaurds on my KT and I painted it with the tracks off so I could get into the road wheels (and they are painted slightly different).. and I realised.. that I don’t know if the sprey pattern on the mud gaurds has to be the same application as the main body work or not?
I think I want to apply some foliage cammoflage too.
Decal will be tricky… some of the locations wher the numbers should be are covered in gear hanging off the tanks.
Thankyou, I’m fairly pleased for a first go.
Yeah to be honest that was my concern too, having played around with yours. That is not knowing when to back off, not just in the stroke but in just how much camo I was laying down. In the end I think I did ok.
Where to from here? Well as mentioned I basecoated Tommy’s two skaven rat ogres, a great finish and far quicker than I could achieve with a brush. Heck I’m tempted to try and do all the flesh and fur areas, I’m just not convinced I have good enough control with the aribrush yet. Nevertheless if all I ever do is undercoating and basecoating that still saves me a lot of time and effort.
With regard to Flames of War, again I could base coat the remaining infantry, not that there are many, mostly assault rifles and well I think we’ve already picked at that festering wound enough. Aside from that I have four pak40s that need painted and a kfz 15 I think. Worth the yellow but not really worth mixing the green and brown for the camo.
Well I’ve seen a few pictures of Kingtigers without the guards. You could just leave them off.
Hmm I’ve kinda always held back from sticking shit onto my tanks because I don’t really want to ruin them by making a hash of it. However I have seen some nice work, just got to make sure that you don’t stick iridescent green on a weathered tank which looks a bit harsh to my eyes at any rate.
Yeah the decals could be tricky. Perhaps cut a piece of paper to fit around the bit of stowage and then use that to template and cut the decal before wetting it? Don’t know will have to have a bit of a play.