LOTR SBG Repairing lost sword

Repairing a lost sword is hard if you don’t have the missing plastic blade.. otherwise you just glue it back on.

Here is how to do it the proper way.


Add florist or brass wire. Brass wire is better for swords as it come straight.. and is much harder and won’t bend so easily. I have used florist wire here.


After a good half hour of filing the set Milliput while watching TV with a square sided needle file and filing the blade edge with a half round needle file I get a good blade.


I will use this method my Orcs too.. but I will set the putty on the wire before adding to the miniature. This lets me make several blades and pick the gnarliest of them.
Also I can make the blades from polymer clay and can cook them before attaching.

I will post later with a better picture of the completed blade. I was considering a war axe or mace.. but they weren’t issued in the movie.. but in LOTRSBG a hand weapon is a hand weapon.. so I could issue him a dagger and it would be just as effective.
The finished sword is narrower than this stage shown.
I hope you like this short article.


LOTR-SBG Repairing broken archers

bow-repair-tools-and-materialsRepairing broken archers

I have repaired some broken archers. They are men of Minis Tirith Archers.
Not wanting to just throw these away because they are missing half a bow I decided to make them go another volley.

I have received many 2nd hand figs and there are always plenty of broken bows.
Here is how to fix them properly.
You can, solvent cement the plastic part back on, if you have it.. but it is hard if you don’t.

I’ll run you through, it.

Here are the three archers I have… they suffer from the problem of the thin weak bow being vulnerable to being broken and worse the broken piece has been lost.


This one looks as if it was broken prior to a previous paint job. The primer hasn’t helped any glue repair. So I clean this surface off.


As part of the clean I make a central starter hole for later pin vice drilling into the hand. This is very important to do.


Drilling.. with my smallest drill..1.0 or 1.5mm drill.


This the wire I am going to use. It is florist iron wire. It is soft and takes a bend easily. This helps when getting the right curve on the bow.
Also the green paper twist absorbs cyrilinte (super glue) very well which becomes a brittle sheath on the wire that is roughly surfaced. This later takes putty very well.


Apply glue. And fit to pin hole. allow to dry/set.


The wire is set and is longer than needed.


Use set of draughtsmans dividers to measure the remaining bow length. Mark this on the long wire and cut with wire cutters so cut faces are forward and back facing this helps achieve a thin end later. Reduces need to file tip too much thus bending bow.


Here are three archers with new bow half wire.


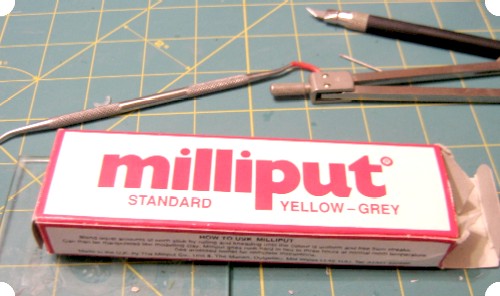
Time to use Milliput putty. Reasons:
Water soluble so you can smooth it without having to apply too much pressure to bow wire.
Easily pressed between finger and thumb.
Sets hard but can most importantly be filed and sanded.. GS can’t.

Applied in a fairly rough shape and pressed.


Here are the archers with putty applied bows. later step is to file the bows to a thin uniform shape to match the lower section.


At this stage I have used excess putty to apply some pavers to the base and my signature .. which is my name in LOTR runes.
I have added a bush knife pouch and a food bag for when this guy is on the march and have to scavenge food etc… this gives him some individual character to what are all uniform models.

I will post pictures later of the finished bow close up.. it does look good.


Warbirds over Wanaka

At easter the family and I travelled up to Wanaka for the day.  A 4am start and left Dunedin at 5am.  Much of the time between Dunedin and Roxburgh was plagued with low lying fog which reduced visibility terribly, not much fun then little is at that time of the morning.  Aside from a stop at Roxburgh to use the facilities, the new automated toiliets which along with the sign in a nearby window indicating coin operated washing machines, which in turn led my children to believe Roxburgh some futuristic town, …perhaps the early morning start…, the trip was without highlight.

Arriving at Wanaka had a poke around all the vehicles.  Much of the warhorses stuff I’d actually seen at Tairei’s Wings and Wheels a month or so earlier,   still would have happily looked longer.  A display of fords including and old and new ford GT, some tractors a bulldozer (yay for bulldozers!).  Headed over to the hanger with the FW-190, purchased a cap from Gilles Kupfer, so much smarter than the lame warbirds caps and given how bright it was and my lack of hat I figured I’d need it.

Walked around the parked aircraft and then took a spot by the fence and spent most of the rest of the day watching the sky with the odd toilet or food break.  Alas because of such breaks I missed some of the RNZAF stuff, annoyingly most of the Hercules display, the Augusta helicopter and Kiwi blue,  (though saw bits of it from where I was)

Anyway the photographs I can be found here.  They’re not great, alas not the best camera in the world I’m afraid particularly for taking photos of things moving about on a sunny day.  http://www.lighteffect.net/gallery/main.php?g2_itemId=1715